How to host your Helm chart repository on GitHub
Apr 2, 2020 · 8 minute readSince the release of Helm 3, the official helm/charts repository has been deprecated in favour of Helm Hub. While it’s great for decentralization and the long term sustainability of the project, I think there’s a lot more that is lost. Where is the best place to go for of the expert advice now? Installing Helm now requires you to manually add each repository you use. And there’s now some added friction to hosting your Helm charts.
Thankfully GitHub has all the tools required, in the form of GitHub Pages and GitHub Actions, to host a fully automated build pipeline and to host a repository for your Helm charts. Also, we can use some of the tools from the community to ensure our charts are high quality.
GitHub Pages
First you need to go ahead and create a gh-pages branch in your repository. As I’m writing this there’s an issue open to do this automatically, but to do it manually you can run the following:
1git checkout --orphan gh-pages
2git rm -rf .
3git commit -m "Initial commit" --allow-empty
4git push
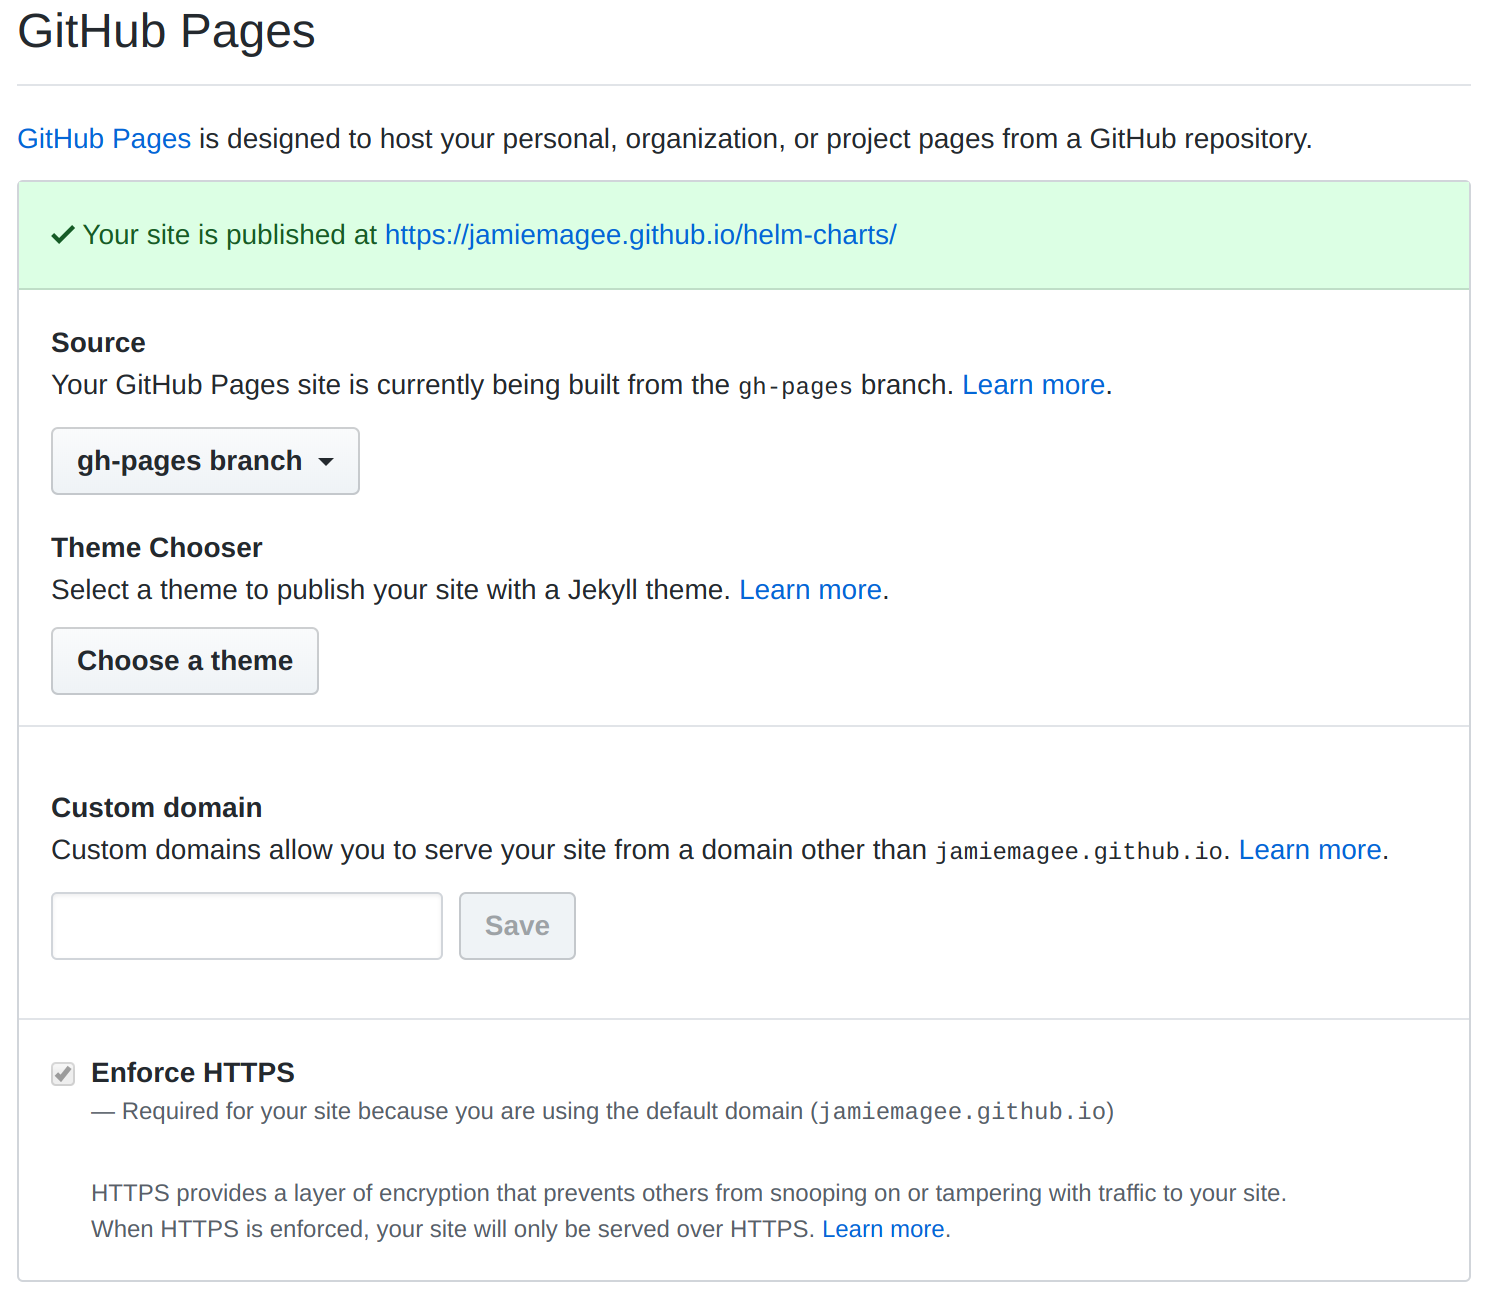
Once you’ve done that, you need to enable GitHub Pages in your repository. Go to the settings page on your repository and set the source branch to the gh-pages branch you just created.
Now you’ve configured GitHub Pages, it will act as your Helm repository. Next, you need to configure GitHub Actions to publish to there.
GitHub Actions
You’re going to use GitHub Actions to create two workflows: one for pull requests, and one for commits to master. Your pull request workflow will deal with linting and testing your chart using a collection of automated tooling. While this isn’t a direct replacement for the expert advice offered by the Helm community, it’s better than nothing. Your master branch workflow will deal with releasing your charts using GitHub pages, meaning you never have to do it manually.
First up let’s look at the pull request workflow.
Pull requests
For each pull request in your chart repository, you want to run a series of different validation and linting tools to catch any avoidable mistakes in your Helm charts. To do that, go ahead and create a workflow in your repository by creating a file at .github/workflows/ci.yaml and add the following YAML to it:
1name: Lint and Test Charts
2
3on:
4  pull_request:
5    paths:
6      - 'charts/**'
7
8jobs:
This will run the workflow on any pull request that changes files under the charts directory.
That’s the skeleton of the workflow sorted, next onto the tools that you’re going to use.
Chart Testing
The Helm project created Chart Testing, AKA ct, as a comprehensive linting tool for Helm charts. To use it in your pull request build, you’ll go ahead and add the following job:
 1lint-chart:
 2  runs-on: ubuntu-latest
 3  steps:
 4    - name: Checkout
 5      uses: actions/checkout@v1
 6    - name: Run chart-testing (lint)
 7      uses: helm/chart-testing-action@master
 8      with:
 9        command: lint
10        config: .github/ct.yaml
Where ct.yaml is:
1helm-extra-args: --timeout 600
2check-version-increment: true
3debug: true
For a full list of configuration options check out this sample file.
The lint action for Chart Testing is a bit of a catch-all that helps you prevent a lot of potential bugs or mistakes in your charts. That includes:
- Version checking
- YAML schema validation on
Chart.yaml - YAML linting on
Chart.yamlandvalues.yaml - Maintainer validation on changed charts
Helm-docs
Helm-docs isn’t strictly a linting tool, but it makes sure that your documentation stays up-to-date with the current state of your chart. It requires that you create a README.md.gotmpl in each chart repository using the available templates, otherwise it will create a README.md for you using a default template.
To use it as part of your pull request build, you need to add the following job:
1lint-docs:
2  runs-on: ubuntu-latest
3  needs: lint-chart
4  steps:
5    - name: Checkout
6      uses: actions/checkout@v1
7    - name: Run helm-docs
8      run: .github/helm-docs.sh
Where helm-docs.sh is:
 1#!/bin/bash
 2set -euo pipefail
 3
 4HELM_DOCS_VERSION="0.11.0"
 5
 6# install helm-docs
 7curl --silent --show-error --fail --location --output /tmp/helm-docs.tar.gz https://github.com/norwoodj/helm-docs/releases/download/v"${HELM_DOCS_VERSION}"/helm-docs_"${HELM_DOCS_VERSION}"_Linux_x86_64.tar.gz
 8tar -xf /tmp/helm-docs.tar.gz helm-docs
 9
10# validate docs
11./helm-docs
12git diff --exit-code
This runs Helm-docs against each chart in your repository and generates the README.md for each one. Then, using git, you’ll fail the build if there are any differences. This ensures that you can’t check in any changes to your charts without also updating the documentation.
Kubeval
Next up is Kubeval. It validates the output from Helm against schemas generated from the Kubernetes OpenAPI specification. You’re going to add it to your pull request, and use it to validate across multiple different versions of Kubernetes. Add the following job:
 1kubeval-chart:
 2  runs-on: ubuntu-latest
 3  needs:
 4    - lint-chart
 5    - lint-docs
 6  strategy:
 7    matrix:
 8      k8s:
 9        - v1.12.10
10        - v1.13.12
11        - v1.14.10
12        - v1.15.11
13        - v1.16.8
14        - v1.17.4
15  steps:
16    - name: Checkout
17      uses: actions/checkout@v1
18    - name: Run kubeval
19      env:
20        KUBERNETES_VERSION: ${{ matrix.k8s }}
21      run: .github/kubeval.sh
Where kubeval.sh is:
 1#!/bin/bash
 2set -euo pipefail
 3
 4CHART_DIRS="$(git diff --find-renames --name-only "$(git rev-parse --abbrev-ref HEAD)" remotes/origin/master -- charts | grep '[cC]hart.yaml' | sed -e 's#/[Cc]hart.yaml##g')"
 5KUBEVAL_VERSION="0.14.0"
 6SCHEMA_LOCATION="https://raw.githubusercontent.com/instrumenta/kubernetes-json-schema/master/"
 7
 8# install kubeval
 9curl --silent --show-error --fail --location --output /tmp/kubeval.tar.gz https://github.com/instrumenta/kubeval/releases/download/"${KUBEVAL_VERSION}"/kubeval-linux-amd64.tar.gz
10tar -xf /tmp/kubeval.tar.gz kubeval
11
12# validate charts
13for CHART_DIR in ${CHART_DIRS}; do
14  helm template "${CHART_DIR}" | ./kubeval --strict --ignore-missing-schemas --kubernetes-version "${KUBERNETES_VERSION#v}" --schema-location "${SCHEMA_LOCATION}"
15done
This script is a bit longer, but if you break it down step-by-step it’s essentially:
- Get a list of charts that have been changed between this PR and master branch
- Install Kubeval
- For each chart:
- Generate the Kubernetes configuration using Helm
- Validatate the configuration using Kubeval
You’re doing this for each version of Kubernetes you’ve defined in the job, so if you’re using an API that isn’t available in all versions, Kubeval will fail the build. This help keep backwards compatibility for all of your charts, and makes sure you’re not releasing breaking changes accidentally.
This doesn’t guarantee that the chart will actually install successfully on Kubernetes—but that’s where Kubernetes in Docker comes in.
Kubernetes in Docker (KIND)
Finally you’re going to use Chart Testing again to install your Helm charts on a Kubernetes cluster running in the GitHub Actions runner using Kubernetes in Docker (KIND). Like Kubeval, you can create clusters for different versions of Kubernetes.
KIND doesn’t publish Docker images for each version of Kubernetes, so you need to look at the Docker image tags. That’s why the Kubernetes versions in this job won’t necessarily match the versions used for the Kubeval job.
 1install-chart:
 2  name: install-chart
 3  runs-on: ubuntu-latest
 4  needs:
 5    - lint-chart
 6    - lint-docs
 7    - kubeval-chart
 8  strategy:
 9    matrix:
10      k8s:
11        - v1.12.10
12        - v1.13.12
13        - v1.14.10
14        - v1.15.7
15        - v1.16.4
16        - v1.17.2
17  steps:
18    - name: Checkout
19      uses: actions/checkout@v1
20    - name: Create kind ${{ matrix.k8s }} cluster
21      uses: helm/kind-action@master
22      with:
23        node_image: kindest/node:${{ matrix.k8s }}
24    - name: Run chart-testing (install)
25      uses: helm/chart-testing-action@master
26      with:
27        command: install
28        config: .github/ct.yaml
So you got a temporary Kubernetes cluster, installed your charts on it, and ran any helm tests (that you definitely wrote 🙄). This is the ultimate test of your Helm chart—installing and running it. If this passes, and you merge your pull request, you’re ready to release!
Releasing
Remember that gh-pages branch you created earlier? Now you can use it to publish your fully tested Helm chart to.
You’re going to create another GitHub workflow, this time at .github/workflows/release.yaml. This one is going to be significantly simpler:
 1name: Release Charts
 2
 3on:
 4  push:
 5    branches:
 6      - master
 7    paths:
 8      - 'charts/**'
 9
10jobs:
11  release:
12    runs-on: ubuntu-latest
13    steps:
14      - name: Checkout
15        uses: actions/checkout@v1
16      - name: Configure Git
17        run: |
18          git config user.name "$GITHUB_ACTOR"
19          git config user.email "$GITHUB_ACTOR@users.noreply.github.com"
20      - name: Run chart-releaser
21        uses: helm/chart-releaser-action@master
22        env:
23          CR_TOKEN: '${{ secrets.CR_TOKEN }}'
It will check out the repository, set the configuration of Git to the user that kicked-off the workflow, and run the chart releaser action. The chart releaser action will package the chart, create a release from it, and update the index.yaml file in the gh-pages branch. Simple!
But one thing you still need to do is create a secret in your repository, CR_TOKEN, which contains a GitHub personal access token with repo scope. This is due to a GitHub Actions bug, where GitHub Pages is not deployed when pushing from GitHub Actions.

Once that’s all configured, any time a change under the charts directory is checked in, like from a pull request, your Github workflow will run and your charts will be available almost instantly!
Next steps
From here you’ll want to add your repository to Helm so you can use it, and share it on Helm Hub so others can too. For the former, you’ll need to run:
1helm repo add renovate https://<username>.github.io/<repository>/
2helm repo update
And for the latter, the Helm project have written a comprehensive guide that I couldn’t possibly top.
If you want to see all these pieces working together checkout the renovatebot/helm-charts repository, or our page on Helm Hub. And if you would like some help please reach out to me on Bluesky at @jamiemagee.bsky.social.